User Access & Permissions
Spacebase includes highly configurable and granular user permission settings designed to support strong internal controls and appropriate segregation of duties across accounting, real estate, and operational teams. User roles and permissions can be tailored to limit access based on responsibilities, allowing organizations to control who can view, create, edit, approve, or export specific data and workflows within the platform. This flexibility helps organizations align system access with their internal control framework, reduce the risk of unauthorized changes, and support audit and compliance requirements, including SOX-related control environments.How are users, access, and permissions managed in Spacebase?
Users are managed in the following ways:- Access via SSO / SAML setup or with a username or password.
- Permissions via Group-level permission settings and by User-level permission settings.
How do I add a new user to my account?
To add new users, you will need to have admin permissions in order to access the Company page.
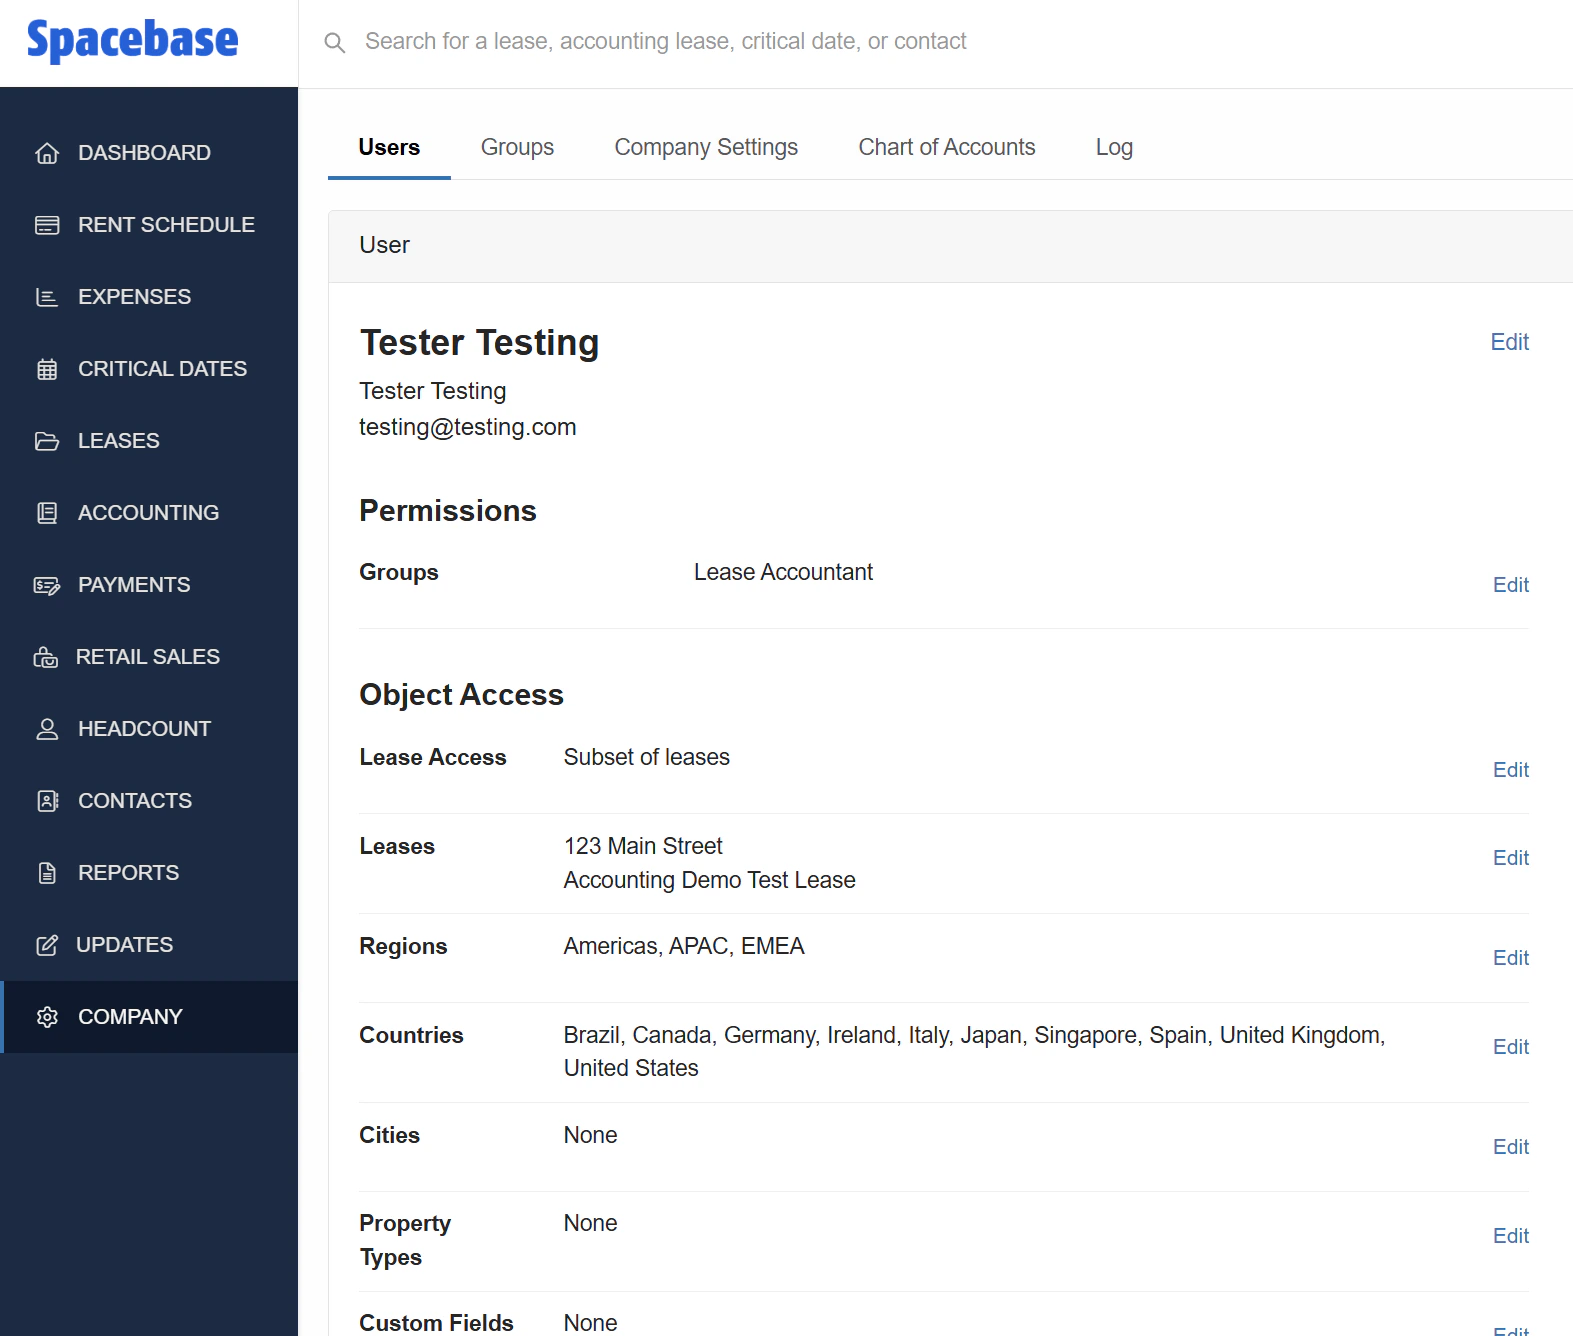
Open the Users tab
On the main sidebar, select Company, which will open to the first tab within Company called Users.
Enter the user's details
Enter their Title, Email address, First name, and Last name, and click the Create User button, which will open a new page for Edit User Permissions.
Assign a group
On the Edit User Permissions page, select the Group that you would like to assign this user, and then click the Update User Permissions button.
How do I reactivate a removed user?
You are not able to edit any of their User Details here.
How do I change a user’s permissions?
There are two methods to changing permissions:- Updating the permissions for the Group.
- Updating the user’s individual permissions (Object Access).
Open the Users tab
On the main sidebar select Company, which will open to the first tab within Company called Users.
Edit the group
In the Edit Group window, you can change:
- Name
- SAML name description
- Select or deselect granular settings options for all areas of Spacebase
Open the Users tab
On the main sidebar select Company, which will open to the first tab within Company called Users.
If the user is in one of the Admin groups, you may not be able to Edit their Object Access. Update their Group before changing individual access.
- Leases: Select Edit beside Leases to select specific leases this user is able to access.
- Regions: Based on the regions populated in Spacebase Leases (e.g. Americas, APAC, EMEA, etc.), select specific regions this user is able to access.
- Countries: Based on the countries populated in Spacebase Leases (e.g. Brazil, Canada, Germany, etc.), select specific countries this user is able to access.
- Cities: Based on the cities populated in Spacebase Leases (e.g. Atlanta, Barcelona, Seattle, etc.), select specific cities this user is able to access.
- Property Types: Based on the property types populated in Spacebase Leases (e.g. Office, Data Center, Land, etc.), select specific property types this user is able to access.
- Custom Fields: Based on the custom fields populated in Spacebase Leases (e.g. GL Codes, Business Segments, etc.), select specific custom fields this user is able to access.
What Groups are available to manage users and user permissions?
Depending on your organization’s internal controls and processes, you may wish to create Custom Groups by clicking on the Create Group button on the Groups page. The following groups are available by default in your account:- Read-Only: Can view lease data.
- Portfolio Admin: Can create, update, and view lease data.
- Lease Accountant - Read-Only: Can view lease data and accounting lease data.
- Lease Accountant: Can create, update, and view lease data and accounting lease data.
- Lease Accountant - Review Leases: Can create, update, and view lease data and accounting lease data, as well as review leases.
- Lease Accountant - Approve Leases: Can create, update, and view lease data and accounting lease data, as well as approve leases.
- Accounting Admin: Can create, update, and view lease data, accounting lease data, and company settings, as well as review and approve accounting leases.
- Company Admin: Can create, update, and view company settings.
- Super Admin: Can create, update, and view lease data, accounting lease data, company settings, and all modules, as well as review and approve accounting leases.
User Account Settings
Under Account Settings you can:- Update your email address
- Update your password
- Update various settings
Make updates
Make updates to:
- First name
- Last name
- Title
- Default Currency
- Select or deselect Display lease expenses in local currency by default
- Define the Default area units (e.g. Square Feet)
- Select or deselect Always display lease size in local unit of measurement by default
- Time zone
- Email notifications (enabled or disabled)
- Avatar color
Configure Important Date Categories
Under Important Date Categories, select:
- Available important date categories and Chosen important date categories.
- Choose important date categories by selecting them and then select the Choose arrow button.
- Remove important date categories by selecting them and then select the Remove arrow button.
Configure Email Notifications
Under Email Notifications, select or deselect the following options:
- Critical dates weekly digest
- Recurring leases weekly summary
- Lease published
- Lease file uploaded
- Lease abstraction begins
- Issue added to lease
- Accounting lease moved to needs review
- Accounting lease approved
- Payments module alerts
- Filter critical dates email by specific categories